
Have you had trouble capturing good audio for video production?
There are many moving parts to just about any production, even a simple interview. I was reminded of this when my friend Kirsten, who works close by, asked: “We are shooting our testimonials and internal messaging… We’re getting pretty good results with the video, but we are completely lost with how to capture audio. Can you recommend something for our DSLR camera setup?”
In today's media landscape, mastering audio for video production is essential for creating impactful visual stories. Audiences can tolerate a mediocre picture but will walk away when the audio is bad.
Table of Contents
Say ‘no’ to the built-in mic (most of the time)
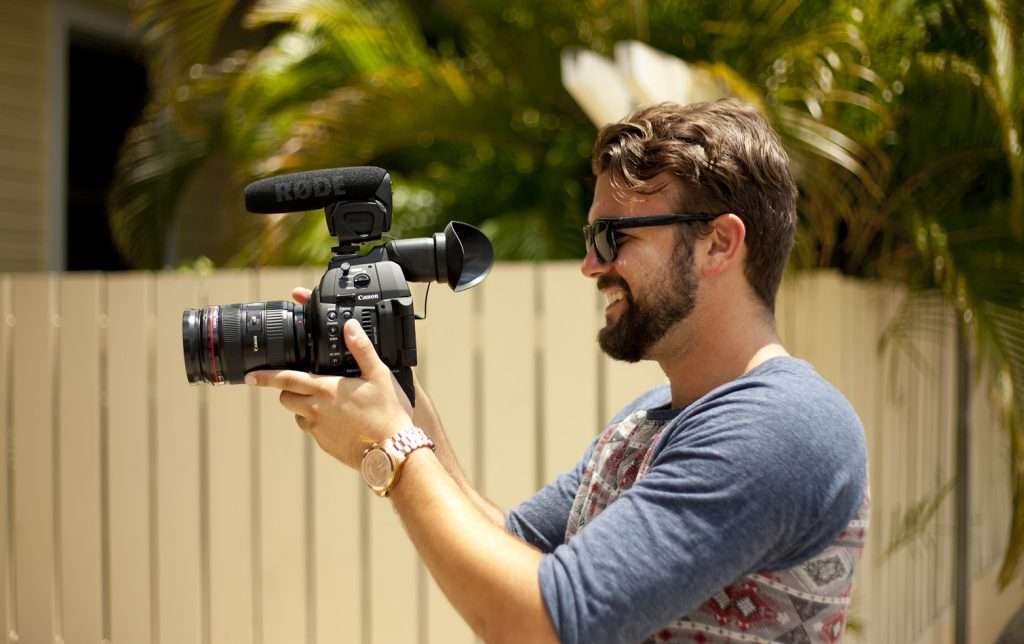
- You should never use the built-in mic on a DSLR camera. There are some higher-priced cameras with decent microphones, but we always choose to work with an external mic.
- The built-in mic should only be used to sync audio if you’re using an external recorder or if you’re recording your nephew saying “basgehtti” for the first time. We’ll get to the external recorder later.
To achieve outstanding results, always consider the various techniques in audio for video production.
Here’s how to do it.
By focusing on the right audio for video production methods, you can significantly enhance the quality of your projects. So let’s jump right in with a few ways you can capture better audio with any camera. All of the techniques in this article can be applied to most cameras you’ll be using, such as a palm-held, DSLR, or shoulder mount.
- If you are using a smaller camera, then you’re probably working with a 3.5mm or 1/8 inch connector. There are a number of adapters on the market that will give you the ability to connect to the appropriate device. B&H is where Mighty Fine Production Company likes to get our adapters.
- Investing in quality audio for video production tools is crucial as it dictates the overall production quality.
On a tight budget? Need an easy-to-use solution?
There are some things you can do to improve the audio quality of your video productions, and using a good on-camera shotgun microphone is one of them. Keep in mind, this should not be your first choice, as there are better options below. However, thanks to their ability to reject sound to the sides and rear—and prioritize what’s in front—shotgun mics can be a useful on-camera tool for audio capture.
- Creating professional-level audio starts with understanding your equipment’s capabilities.
- Remember, effective audio for video production requires getting as close to your source as possible for the best results. Regardless of what you are using.
- Quality audio for video production is just as important as the visuals; it should never be an afterthought.
Powered vs Phantom Powered Audio
Some cameras don’t provide enough gain or phantom power on their own, so you may need a powered mic (with its own battery or internal preamp) or an external device that can provide phantom power. Either way, boosting the mic’s signal before it hits the camera usually results in cleaner audio than relying on the camera’s built-in preamps. This is especially true with non-professional cameras. By adjusting the mic’s output level and lowering the camera’s input gain, you can often get better overall audio.
So why’s this not ideal? There are limits to any on-camera shotgun setup. For starters, you’ve got to be relatively close to the person you’re interviewing. If you’re 10 feet away, guess what—it’s going to sound like you’re 10 feet away. The closer, the better with any of these mics. Get up in people’s grill.
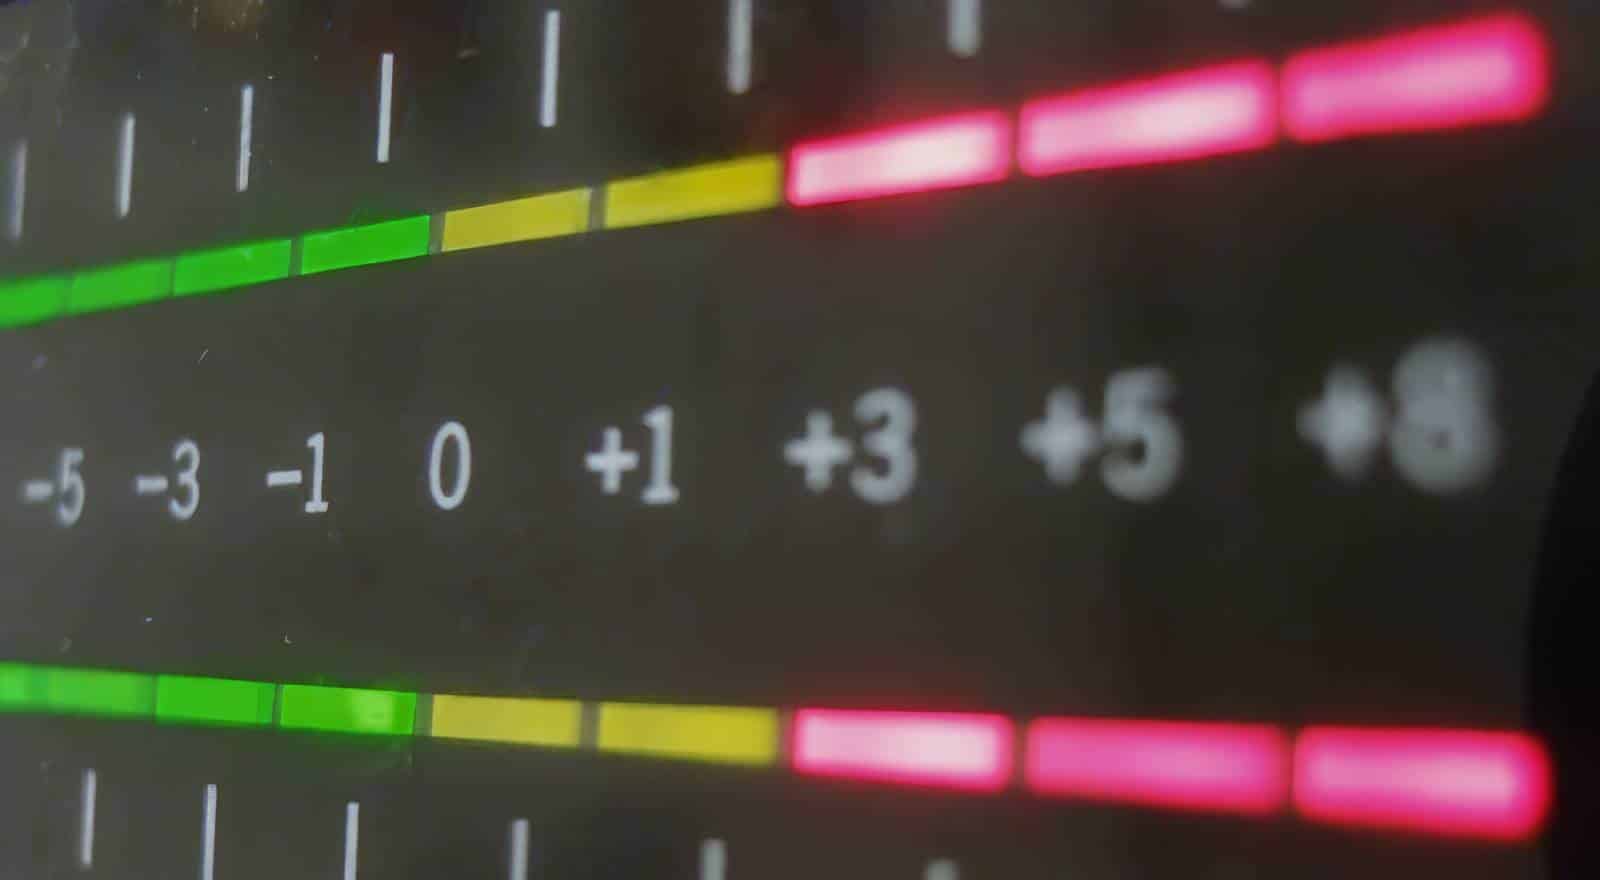
Never use auto-audio levels on your camera.
- The auto audio levels in your camera don’t know the difference between your talent and everything else in the area. That means auto settings will try to pick up all noises.
- Do you have a giant mouse roaming around the room? A noisy air conditioner? Your camera's auto level will try to grab that too, so get used to using manual settings if you have them. This is important.
- First, rein in and set your recording levels in your camera after connecting the external mic. This allows you to adjust for how loud or soft your talent is speaking, so make sure you dial in the appropriate setting. You ever hear someone saying check one two, check one two?
- The ideal target is -12 dB. It’s okay if you go over a bit, just don’t hit the red—that’s called peaking, and it can render your audio useless.
How do you even start to dial in the levels and avoid peaking? Position yourself for the interview and have your talent talk until you have the right levels. This might sound confusing, but it’s pretty simple once you understand your menu. With a little practice, you’ll have it in no time.
Cut the cord with wireless lavaliers.
Wireless lavaliers are probably the most convenient recording devices to use, and they provide excellent audio. Why? Because you can set your camera anywhere you want and have the mic right on your talent.
- Let’s say you want to get a shot of the whole room while the camera is focused on the person speaking—you can do that. The audio won’t change with distance.
- Wireless lavaliers are small, but you can see them on your talent unless you hide them.
- For most people, it’s best to have the mic 6–12 inches from the speaker’s mouth.
The talent will look more natural if there isn't a lavalier mic on their clothing; it's a cleaner look. However, there are pitfalls for hiding the mic if it isn't done right. Your hair or clothing brushing a mic can sound like a windstorm. Here's a video tutorial on ways to hide a mic so you don't get any distortions.
Mighty Fine Production Company traditionally uses Tram Lavaliers when we try to conceal microphones because we’ve found that the sound quality and size are fantastic. Rycote provides some excellent budget solutions for hiding microphones and protecting them from wind noise.
- Lavalier setups are self-powered and can be plugged directly into your camera with the appropriate connectors.
- They can also be used with an external recorder—we’ll get to that in a moment.
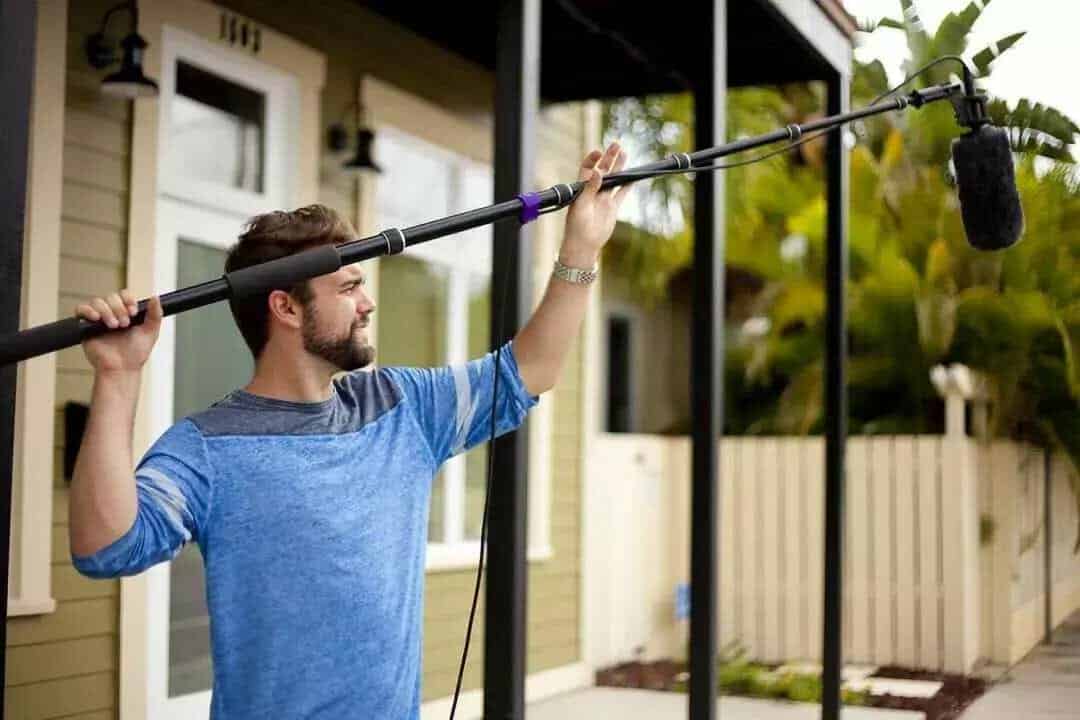
Here comes the Boom. Embrace the Boom and Shotgun Mic.
Finally, we get to Mighty Fine’s preferred method: the boom and shotgun mic. This setup is what most industry professionals use when audio is critical to a video’s production. A good shotgun mic provides the most natural sound for video productions. We can set the mic at the perfect height and 45-degree angle while maintaining a natural look—no mic in sight!
- Some shotgun mics are powered, but most of the high-end solutions require phantom power from the camera or a recorder. We use the Sennheiser MKH 416 for most of our video productions.
- Don’t compromise on audio for video production; it’s what brings your visuals to life. Sometimes it’s best to have an audio engineer on hand, but for most interviews or testimonials, you’ll only need a boom holder (or grip head) and a C-stand.
- The boom holder should be in everyone’s audio toolkit.
Having a solid understanding of audio for video production will elevate your storytelling.
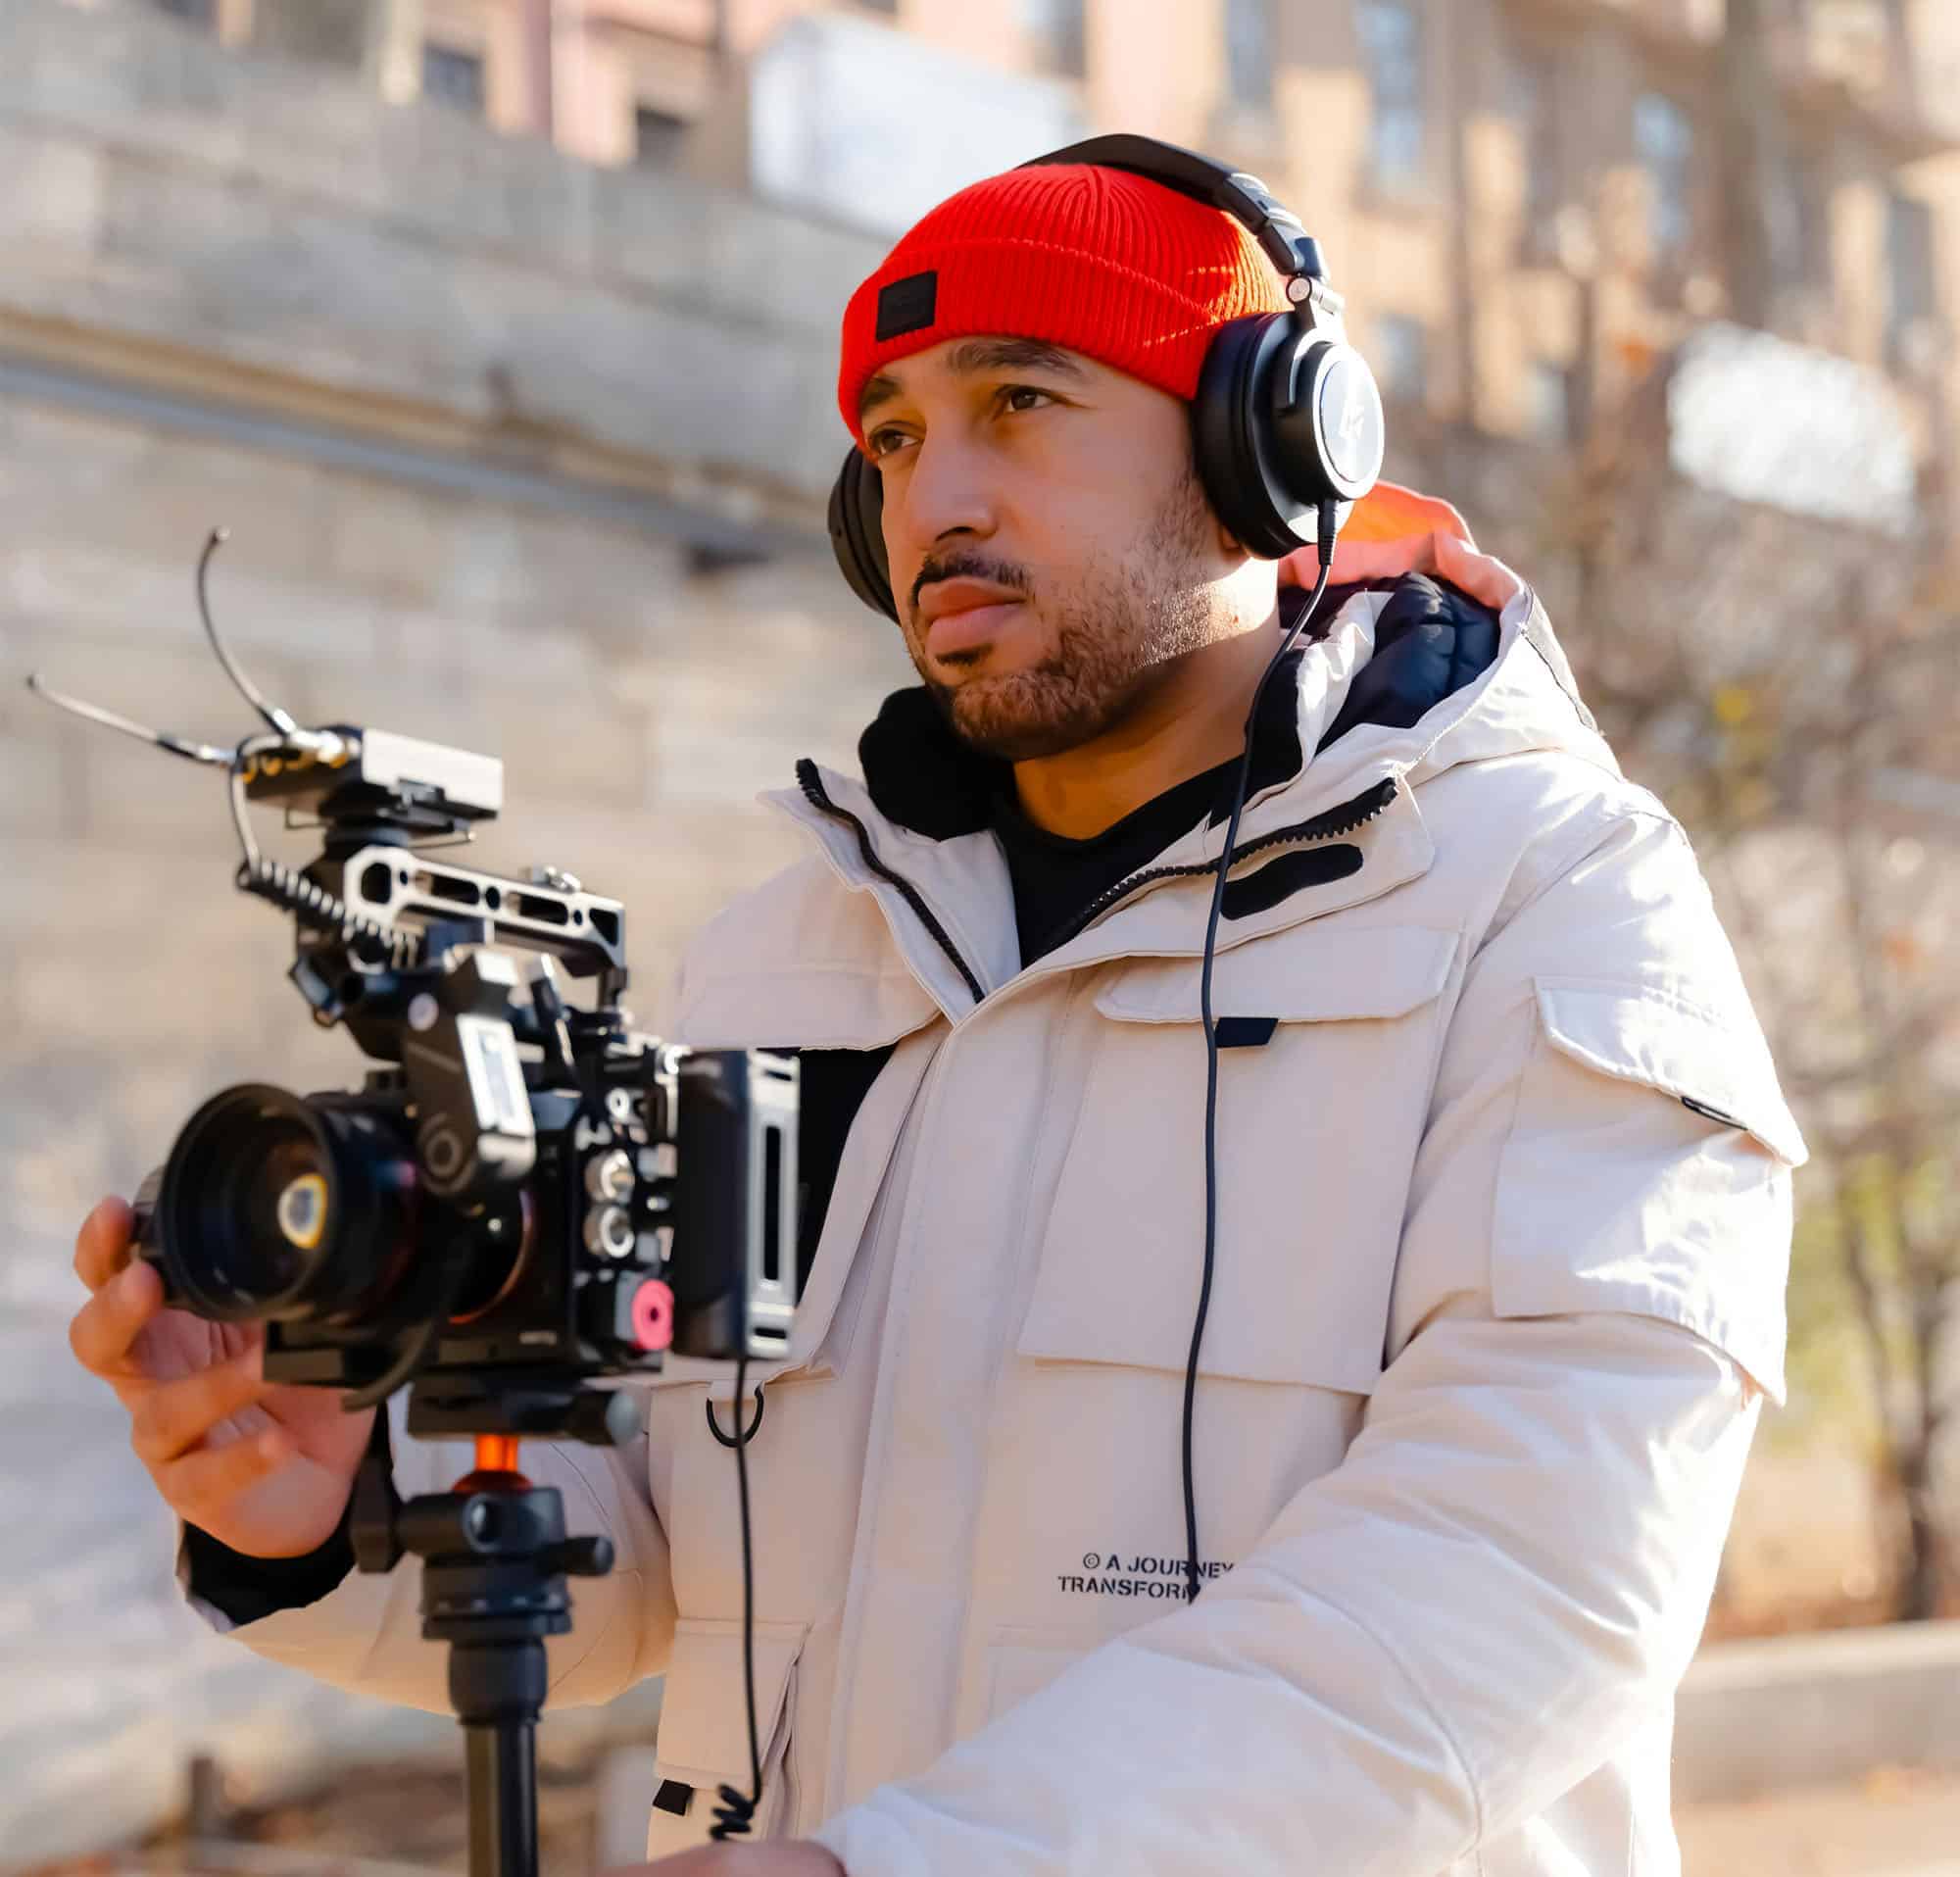
There’s an advantage to using an external preamp or recorder.
Why? Because external preamps and recorders typically deliver higher-quality audio than what your camera alone can provide. They often offer higher resolution, better bit rates, and more precise gain control. Plus, you can still pair an external recorder with a shotgun mic in a run-and-gun scenario without sacrificing flexibility.
It’s a far better solution than relying on just a shotgun mic on a budget camera—the difference in quality can be night and day. Of course, you still need to keep the mic close to your subject. Get up in there.
As for syncing, most editing software can automatically match external audio with your camera footage. That’s why it’s crucial to keep your camera’s built-in audio rolling as a reference track—so you’ll have no headaches when it’s time to edit.
To make this easy, we recommend one manufacturer for external recording: Zoom Recorders have options for every budget. The company even offers some smartphone solutions.

What audio equipment for video production should I consider?
There are tons of audio packages to choose from. Some are really cheap, but you usually get what you pay for. On the flip side, there are some packages that would require a second mortgage.
Both of the companies listed provide a wide range of products that should accommodate most budgets. More advanced options are available for when you're ready to upgrade. However, these provide excellent value.
Let’s face it, you’re not making a Hollywood movie. We recommend Audio Technica or Rode recording devices. They are good, moderately priced microphones that work great for interviews, testimonials, or just about anything else you’re shooting.
Final word on audio for video.
Keep in mind that if your viewers can't hear a word, it won't matter how beautiful the images are. Focusing on the right mic placement, gain settings, and microphone selection will allow you to record audio that sounds professional and brings your story to life. Mighty Fine Production Company is there to lend a helping hand or provide guidance if needed. We can enhance the audio quality of your upcoming shoot!